
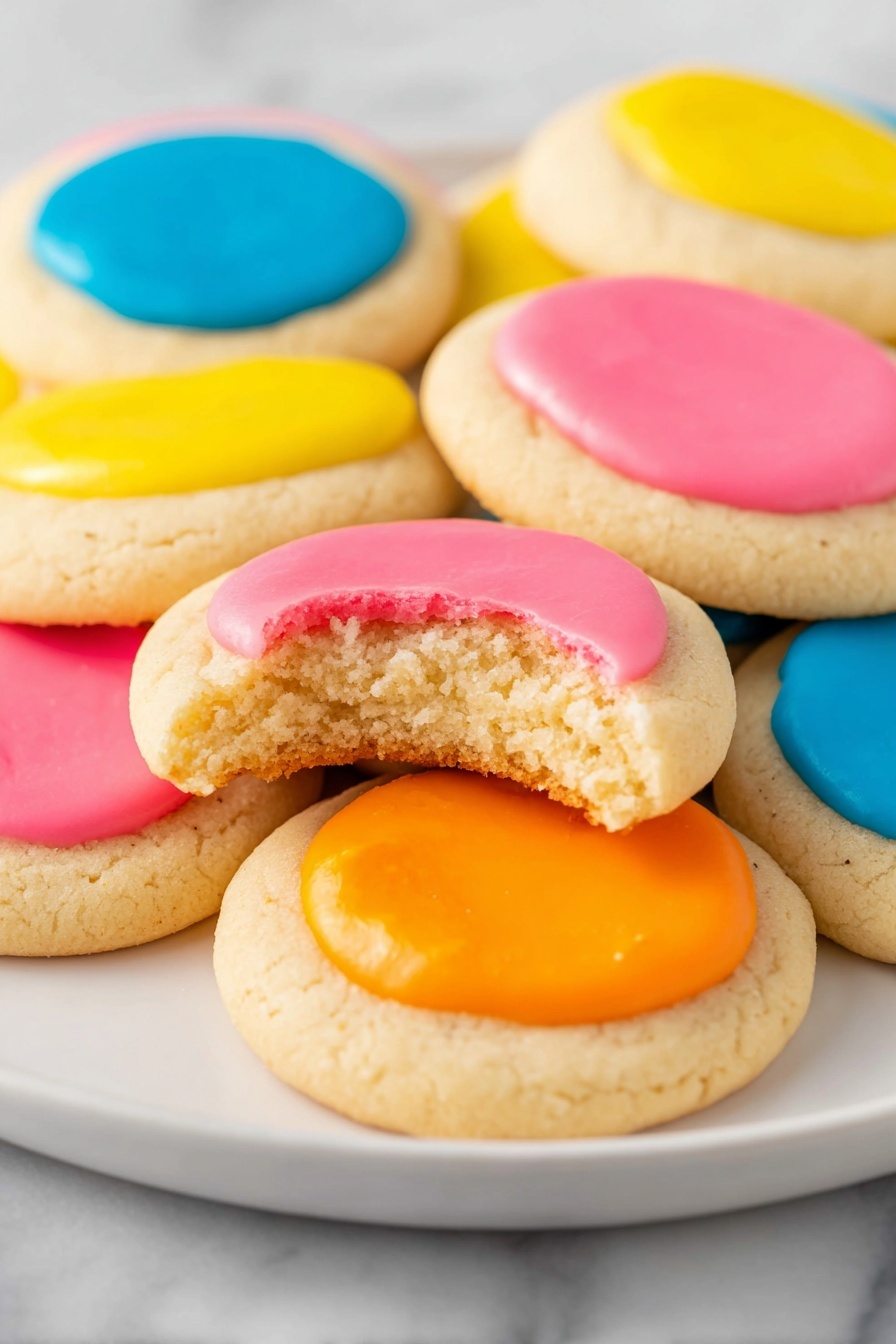
If you’re looking for a fun, cheerful treat to brighten your day (or your holiday table), you’ve got to try this Thumbprint Cookies with Colorful Icing Recipe. These little beauties are buttery, soft, and downright charming with their adorable icing-filled centers. Trust me, once you try making these, you’re going to want to share them with everyone you know – or maybe keep them all to yourself!
Why You’ll Love This Recipe
- Easy to Make: The steps are straightforward and perfect for both beginners and seasoned bakers.
- Customizable Colors: You get to pick your favorite icing colors, making every batch uniquely yours.
- Perfect Texture: Buttery soft cookies with just the right crisp at the edges.
- Great for Gifting: These cookies look festive and feel extra special when given as gifts or shared at parties.
Ingredients & Why They Work
Each ingredient in this Thumbprint Cookies with Colorful Icing Recipe plays a role in making the cookies perfectly tender, flavorful, and easy to decorate. Plus, they come together with common pantry staples — no fancy or hard-to-find items needed!
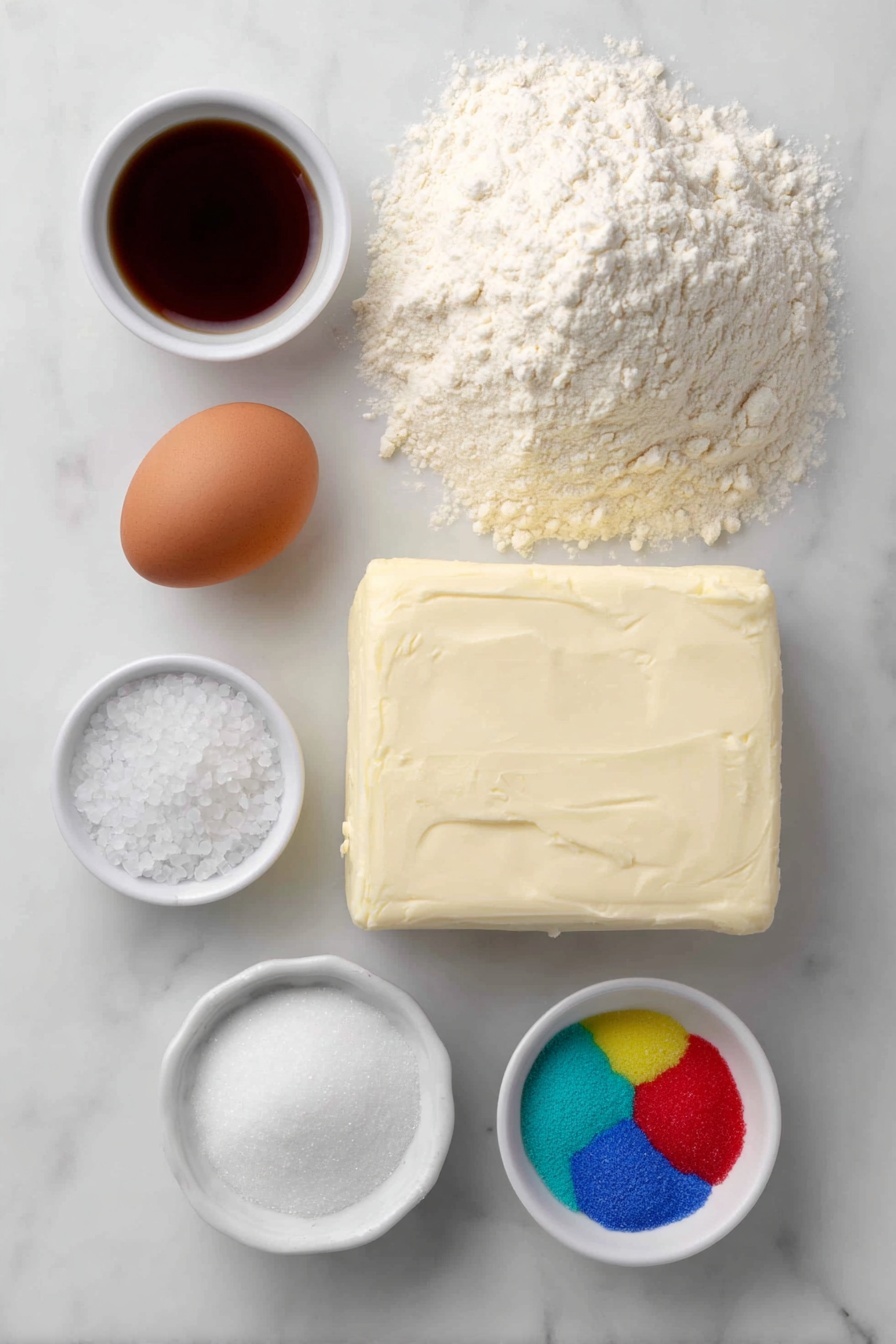
- All-Purpose Flour: Provides structure without making the cookies too dense. Make sure it’s fresh for best results.
- Salt: Balances sweetness and enhances the buttery flavor.
- Unsalted Butter: The star of the show for that rich, melt-in-your-mouth texture — room temperature butter works best for creaming.
- Granulated Sugar: Adds sweetness and helps with that tender crumb.
- Egg: Binds ingredients together and adds moisture.
- Clear Vanilla Flavoring: Gives a clean vanilla scent without coloring the dough — perfect for showcasing icing colors.
- Powdered Sugar: Essential for the icing, ensuring it’s smooth and silky.
- Whole Milk: Thins the icing just enough for spreading and filling the cookie centers.
- Gel Food Coloring: Gives intense, vibrant colors without watering down the icing. Plus, a little goes a long way!
Make It Your Way
I love playing around with the colors in this Thumbprint Cookies with Colorful Icing Recipe — it feels like a mini art project in my kitchen! You can stick with classic red and green for Christmas, pastel tones for Easter, or go wild with neon colors just for fun. Don’t be shy about making it your own.
- Add a Flavor Twist: I once added almond extract alongside vanilla for a nuttier flavor, and the cookies were instantly elevated. Try orange or lemon zest for a fresh zing!
- Make It Vegan: Substitute vegan butter and an egg replacer to create a dairy-free and egg-free version that still turns out beautifully.
- Nutty Add-Ins: Some chopped nuts mixed into the dough can give a delightful crunch — I’ve done pecans and almonds before and adored the texture contrast.
- Sugar-Free Icing: You can swap powdered sugar for a powdered erythritol blend if you’re watching sugar intake.
Step-by-Step: How I Make Thumbprint Cookies with Colorful Icing Recipe
Step 1: Prep Dry Ingredients & Cream Butter
Start by whisking your flour and salt together in a medium bowl — this helps ensure even distribution and prevents salty clusters. In a larger bowl, cream your softened butter and sugar until everything’s smooth and fluffy, about 2-3 minutes; this is key for tender, melt-in-your-mouth cookies. I use a hand mixer because it’s quicker, but a stand mixer or even some arm power will do just fine!
Step 2: Add Egg and Vanilla, Then Combine Dough
Next, beat in the egg and clear vanilla flavoring until the mix is nice and smooth. Slowly add your dry ingredients on low speed, being careful not to overmix. Stop once you see the dough come together — it should be thick and smooth. Don’t forget to scrape the bowl with your spatula so nothing is stuck to the sides!
Step 3: Chill the Dough
Pop the dough into the fridge for 60 minutes. This resting time makes the dough easier to handle and prevents spreading when baking. Trust me, even if you’re impatient, the chill time is worth it!
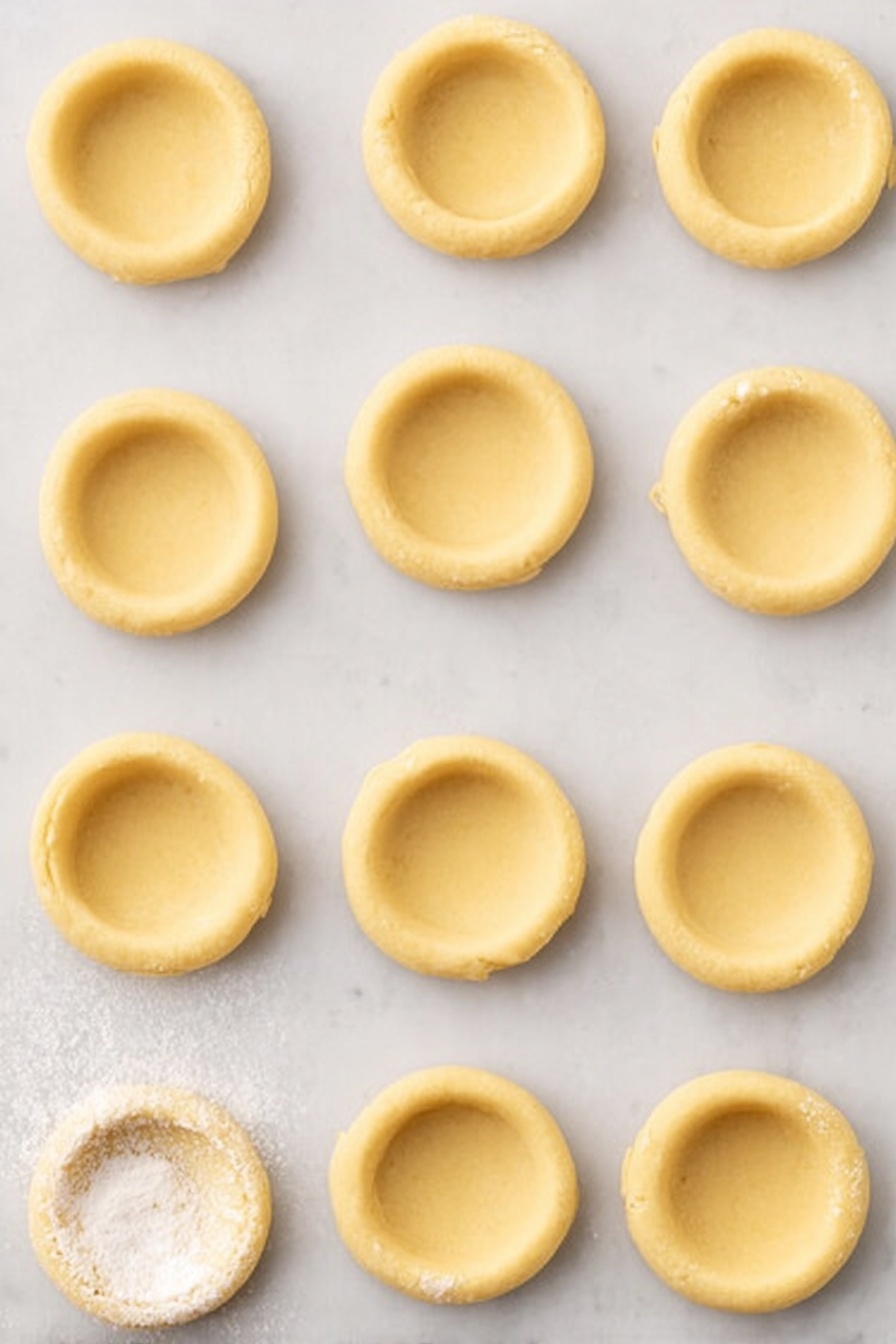
Step 4: Shape and Indent Each Cookie
Preheat the oven to 350°F and line your baking sheets with parchment paper — makes cleanup so much easier. Using a 1-tablespoon scoop (or just measure carefully), roll the chilled dough into smooth balls. Place them spaced well apart because they’ll spread a touch. Now, here’s a little trick I swear by: keep a small bowl of flour nearby and dip your thumb or the rounded measuring spoon in it before pressing the indent. This stops the dough from sticking and lets you create a clean, shallow well — don’t press all the way through!
Step 5: Bake and Cool
Bake the cookies for about 10-12 minutes, watching for a light golden edge but no deep browning. When fresh out of the oven, let them rest on the sheet for 5 minutes before transferring to a cooling rack. If the indentations rise too much while baking, gently press them again while the cookies are still warm — it really helps make room for that luscious icing.
Step 6: Whip Up Your Icing and Decorate
For the colorful icing, simply whisk sifted powdered sugar, whole milk (start with 2 tablespoons), and vanilla flavoring until smooth but thick – you want it to hold shape without dripping. Add gel food coloring, a few drops at a time, until your chosen color shines through with no streaks. I sometimes put the icing in small piping bags (or zipper bags with tiny snips) for neat filling. Fill the indents carefully, avoiding overflows, then let the cookies sit at room temperature until the icing firms up. Patience is key here — I usually leave mine overnight!
Pro Tips for Making Thumbprint Cookies with Colorful Icing Recipe
- Flour Your Thumb for Perfect Indents: Dipping your thumb or spoon in flour before pressing the dough prevents sticky fingers and ensures a clean indentation every time.
- Don’t Overfill the Icing: Filling just to the edge looks neat and prevents messy spills when the icing softens.
- Chill Dough for Easier Handling: A well-chilled dough makes rolling and shaping so much simpler and less sticky.
- Patience with Icing Firming: Icing takes time to set up — letting your cookies rest overnight makes stacking and packaging a breeze.
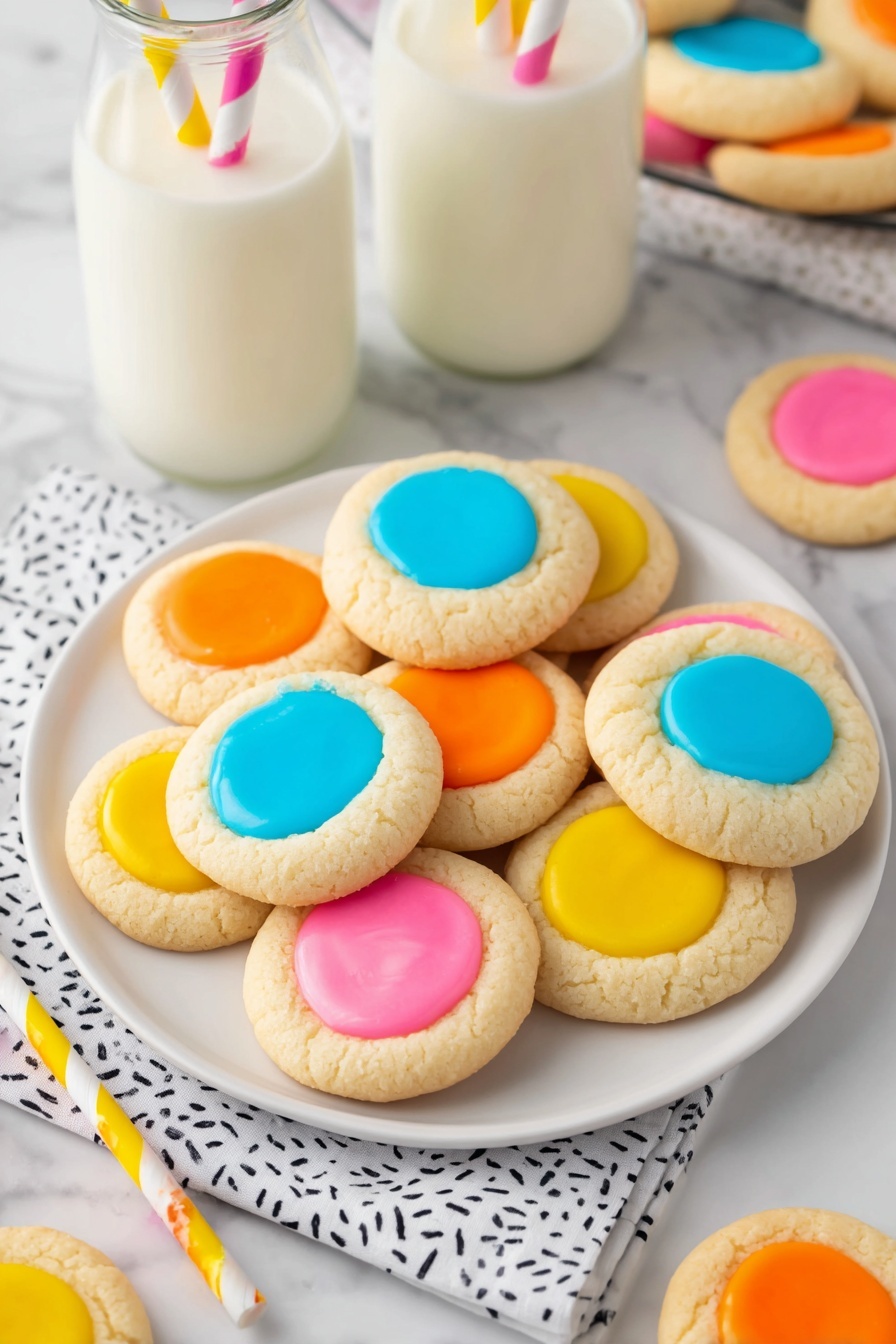
How to Serve Thumbprint Cookies with Colorful Icing Recipe
Garnishes
I usually keep it simple with the icing, but if I want to jazz things up, I sprinkle some edible glitter or nonpareils on top of the wet icing before it sets. Tiny sprinkles add a whimsical touch without overwhelming the vibrant colors. Sometimes I add a tiny dried flower petal or a pinch of finely chopped nuts if I want to impress guests.
Side Dishes
These cookies pair wonderfully with a hot cup of tea or coffee — their buttery softness and sweet icing balance out a robust drink beautifully. If you’re serving at a party, I like pairing them with a fresh fruit platter or a simple cream cheese frosting-dipped fruit skewers for some tart contrast.
Creative Ways to Present
Once, I arranged these Thumbprint Cookies with Colorful Icing Recipe in a rainbow pattern on a white platter for a birthday party — it stole the show! Another favorite is stacking them in clear jars tied with colorful ribbons as charming gifts. If you’re into themed events, you can use matching food coloring and package them in decorated tins and boxes for that extra personal touch.
Make Ahead and Storage
Storing Leftovers
I store leftover iced thumbprint cookies in a single layer inside an airtight container at room temperature. They keep their softness and flavor beautifully for about 4-5 days — just be sure to avoid stacking until you’re certain the icing is fully set!
Freezing
When I want to prep in advance, I freeze the cookie dough balls before baking, tightly wrapped in plastic and placed in an airtight container. They freeze wonderfully for up to two months. Just thaw them overnight in the fridge before pressing the indents and baking. I usually don’t freeze the cookies once iced since the icing doesn’t freeze as well.
Reheating
If your cookies have been stored a bit and you want a fresh-baked feel, I pop them in a warm oven at 300°F for 3-4 minutes. This softens the texture without melting the icing. Just watch closely to avoid overbrowning, and they’ll taste like they came straight out of the oven!
FAQs
-
Can I use different flavorings instead of clear vanilla?
Absolutely! Feel free to swap clear vanilla with almond, lemon, or even a hint of coconut extract to vary the flavor profile. Just remember, some extracts have strong flavors, so start with half the amount and adjust to taste.
-
How can I make the icing less sweet?
Since the icing is primarily powdered sugar, it’s naturally sweet. To mellow it out, reduce the powdered sugar slightly or add a small pinch of salt. Alternatively, consider mixing in a bit of cream cheese for tang and balance, though this will change the icing’s texture and stability.
-
What if my cookie dough is too sticky to shape?
Chilling the dough is key, but if it’s still sticky, try dusting your hands lightly with flour before scooping and rolling. If needed, add a tablespoon more flour to the dough to reach the right consistency, but add it gradually to avoid drying out the cookies.
-
Can I use liquid food coloring instead of gel?
You can, but liquid food coloring may thin your icing too much. If you go this route, reduce the milk slightly to maintain thickness or add extra powdered sugar. Gel coloring is preferred for its vibrant hues without altering texture.
Final Thoughts
This Thumbprint Cookies with Colorful Icing Recipe has become a go-to in my kitchen whenever I want something comforting yet playful. The process feels like a little joyful pause, and the bright icing always brings smiles (sometimes more for me as I sneak a few). I hope you find as much happiness baking and sharing these as I do – trust me, they’re worth every minute. So grab your ingredients, get those thumbs ready, and start baking some colorful memories!
Print
Thumbprint Cookies with Colorful Icing Recipe
- Prep Time: 15 minutes
- Cook Time: 12 minutes
- Total Time: 1 hour 15 minutes
- Yield: 24 servings
- Category: Dessert
- Method: Baking
- Cuisine: American
- Diet: Vegetarian
Description
Delightful thumbprint cookies filled with smooth, colored icing. These buttery cookies have a soft crumb and a charming indentation filled with sweet, vanilla-flavored icing, perfect for festive occasions or everyday treats.
Ingredients
Cookies:
- 2 cups all-purpose flour
- ½ teaspoon salt
- 1 cup unsalted butter softened to room temperature
- ⅔ cup granulated sugar
- 1 large egg room temperature
- 1 teaspoon clear vanilla flavoring
Colored Icing:
- 2 cups powdered sugar sifted
- 2-3 tablespoons whole milk
- ½ teaspoon clear vanilla flavoring
- 2-3 drops gel food coloring
Instructions
- Prepare Dry Ingredients: In a medium bowl, combine the all-purpose flour and salt. Set aside.
- Cream Butter and Sugar: In a large bowl, using a hand mixer on medium speed, beat the softened butter and granulated sugar together for 2-3 minutes until smooth and creamy.
- Add Egg and Vanilla: Beat in the egg and clear vanilla flavoring for 1-2 minutes until fully incorporated.
- Combine Dry and Wet Ingredients: Add the flour mixture to the wet ingredients and beat on low speed until the dough forms a thick, smooth consistency. Scrape the bowl sides to fully incorporate all flour.
- Chill Dough: Cover the dough with plastic wrap and refrigerate for 60 minutes to firm up.
- Preheat Oven and Prepare Baking Sheets: Preheat oven to 350 degrees Fahrenheit. Line two large baking sheets with parchment paper.
- Shape Dough Balls: Using a 1 tablespoon cookie scoop, portion dough and roll into smooth balls. Place on prepared sheets, leaving 2 inches between each.
- Create Indentations: Press a ¾ to 1-inch wide indentation into each dough ball using your thumb or a rounded measuring spoon, ensuring not to go through the bottom.
- Bake Cookies: Bake for 12 minutes or until bottoms are just lightly golden.
- Cool Cookies: Let cookies cool on baking sheets for 5 minutes, then transfer to a wire rack to cool completely before icing.
- Mix Icing: In a large bowl, whisk together sifted powdered sugar, 2 tablespoons whole milk, and vanilla until thick but spreadable. Add additional milk 1 teaspoon at a time to reach desired consistency.
- Add Coloring: Stir in 2-3 drops gel food coloring or more until uniform color is achieved.
- Fill Indentations: Spoon or pipe the colored icing into the cooled cookie indentations carefully without overfilling.
- Set Icing: Allow iced cookies to sit at room temperature to firm the icing before serving or storing.
Notes
- Store iced cookies in a single layer in an airtight container at room temperature for 4-5 days.
- Freeze unbaked dough balls or baked cookies (without icing) in airtight containers for up to 2 months; thaw dough in refrigerator before shaping and baking.
- Dip your thumb or spoon in flour before pressing to prevent dough sticking.
- If the indentation rises while baking, gently press it down while cookies are warm for a clearer well for icing.
- Allow icing to firm overnight at cool room temperature before stacking or storing.
Nutrition
- Calories: 140 kcal
- Sugar: 9 g
- Sodium: 30 mg
- Fat: 7 g
- Saturated Fat: 4 g
- Unsaturated Fat: 2 g
- Trans Fat: 0 g
- Carbohydrates: 19 g
- Fiber: 0 g
- Protein: 1 g
- Cholesterol: 20 mg


