
If you’re on the hunt for a festive, melt-in-your-mouth holiday treat, you’ve got to try this Peppermint Thumbprint Cookies with Chocolate Almond Recipe. It’s one of those recipes I keep coming back to every winter because it’s quick, festive, and delivers that perfect combo of chocolate, peppermint, and a buttery cookie that everyone loves. Trust me, once you make them, your cookie jar won’t last long!

Why You’ll Love This Recipe
- Quick and Simple: Using a premade sugar cookie mix cuts way down on prep time without sacrificing flavor.
- Festive Flavors: Peppermint extract and crushed candy canes give these cookies a magical holiday vibe.
- Perfect Texture: The cocoa powder in the dough adds richness, balancing the sweet and minty toppings beautifully.
- Family Friendly: These cookies are easy for kids to help with, especially making the thumbprints and sprinkling candy.
Ingredients & Why They Work
Each ingredient in this Peppermint Thumbprint Cookies with Chocolate Almond Recipe brings harmony to the final treat. Let me walk you through why these particular elements are essential and how to choose the best versions at the store.
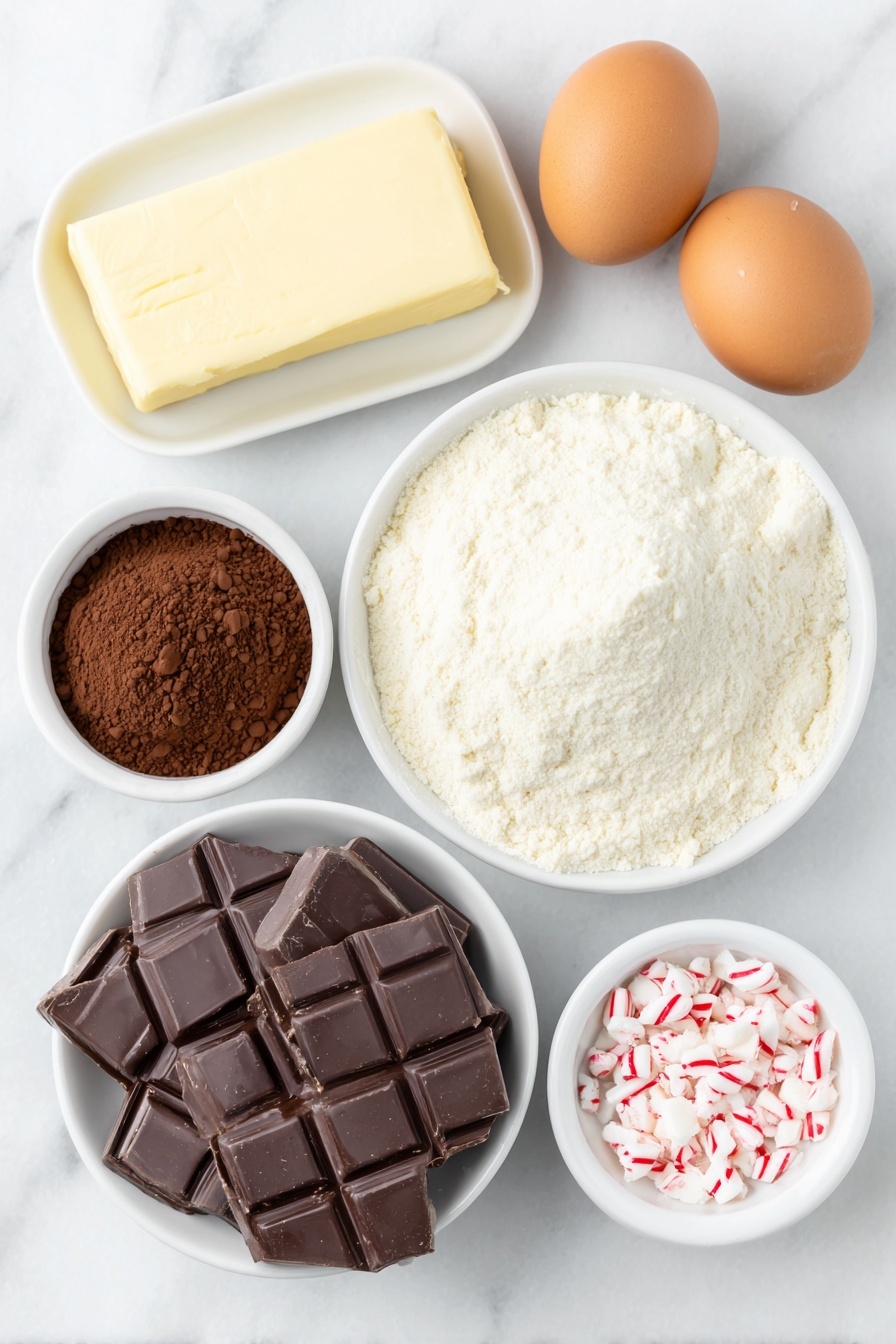
- Sugar cookie mix: Using a trusted premade mix gives you consistent cookies with minimal fuss—perfect for a quick holiday bake.
- Salted butter: Adds richness and depth to the dough; salted balances the sweetness nicely.
- Cocoa powder: A touch of cocoa creates a subtle chocolate undertone that complements the almond bark topping.
- Eggs: Bind everything together for that perfect chewy but tender texture.
- Peppermint extract: The star of the show—make sure to grab pure extract for the strongest, cleanest peppermint flavor.
- Chocolate almond bark: Melts easily and hardens beautifully for shiny, festive wells in the cookies.
- Crushed candy canes: Adds that crunchy peppermint kick and pretty holiday color on top.
Make It Your Way
I love adding a little twist here and there when I make this Peppermint Thumbprint Cookies with Chocolate Almond Recipe. It’s a great base recipe that’s very forgiving, so don’t hesitate to personalize it according to your taste or dietary needs.
- Mint-chocolate swap: I sometimes substitute the peppermint extract for orange or vanilla extracts for different flavor vibes that still work beautifully.
- Nut-free version: If you’re allergic, swap out the chocolate almond bark for plain chocolate bark or your favorite allergen-free chocolate.
- Smaller cookies: When I need more treats for a party, making smaller dough balls still gives plenty of cookie love without needing extra ingredients.
Step-by-Step: How I Make Peppermint Thumbprint Cookies with Chocolate Almond Recipe
Step 1: Mix the Dough with Peppermint Pep
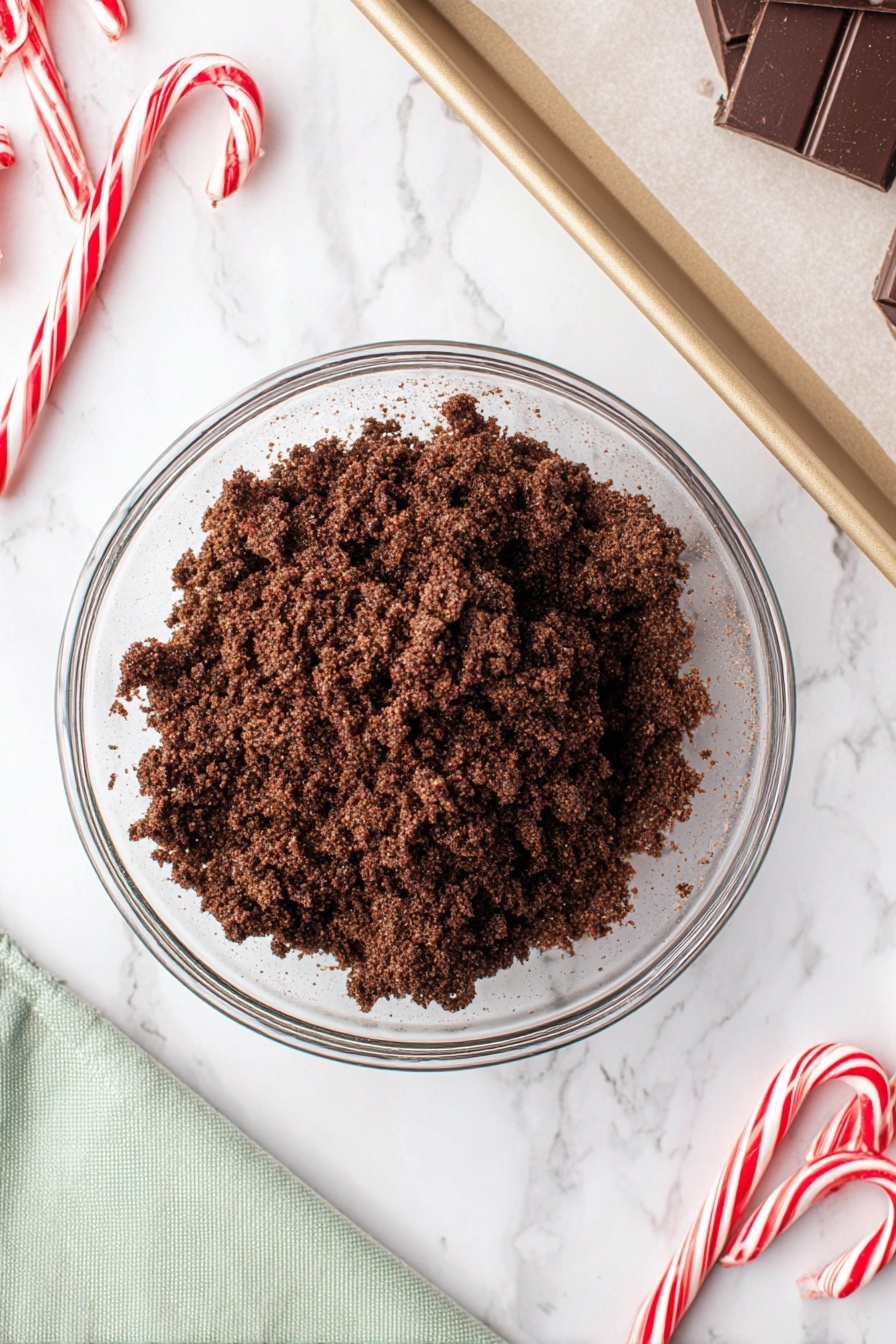
Start by preheating your oven to 350°F. Then grab a large bowl and beat together the sugar cookie mix, softened salted butter, cocoa powder, eggs, and peppermint extract. I use my stand mixer for this step, but a hand beater works just fine. Mix until everything is combined and the dough looks glossy and smooth — no dry pockets of flour! This step smells amazing as the peppermint hits the air.
Step 2: Shape and Thumbprint Your Cookies
Line a sheet pan with parchment paper—it makes clean up simpler and helps cookies slide right off. Scoop about 1-inch balls of dough (I love using a tablespoon scoop for consistent sizes). Roll between your hands until smooth, and place them spaced apart on the pan. Press your thumb or a teaspoon into the center of each ball to create a nice, deep well. If any cracks appear, just gently smooth the dough back together—it’s forgiving.
Step 3: Bake Until Just Set and Make Room for Chocolate
Bake the cookies for 8 to 10 minutes. You want the centers to start setting but still soft enough to press again. Right after removing them from the oven, press your spoon or thumb into each cookie again to ensure those wells stay intact for the melty chocolate finish. Let the cookies cool while you melt the chocolate almond bark.
Step 4: Melt and Pour the Chocolate Almond Bark
Melt the chocolate almond bark in a microwave-safe bowl in 20-second bursts, stirring in between to prevent burning. When smooth and glossy, spoon the melted chocolate into each cookie well, filling it entirely. Don’t be shy—it makes all the difference! While the chocolate is still soft, sprinkle crushed candy canes on top for festive crunch and color.
Step 5: Cool and Enjoy Your Festive Treats
Let the cookies sit for 3 to 5 minutes to allow the chocolate to harden just enough while the cookies stay slightly warm. Then, they’re ready to share. Bonus: I find they taste AMAZING while still a bit warm, but they’ll keep well once fully cooled too.
Pro Tips for Making Peppermint Thumbprint Cookies with Chocolate Almond Recipe
- Consistent Cookie Size: Use a tablespoon scoop to make sure all your cookies bake evenly—no over- or underdone edges!
- Re-Press Right After Baking: Cookies puff up in the oven and can lose their thumbprint wells—press again as soon as they come out to keep the chocolate wells perfect.
- Crush Candy Canes with Care: I always pop candy canes in a plastic bag and lightly tap with a rolling pin for chunky bits—not powdery dust.
- Don’t Overbake: Baking 8-10 minutes keeps the cookies soft inside, but they’ll firm up as they cool with chocolate topping.
How to Serve Peppermint Thumbprint Cookies with Chocolate Almond Recipe

Garnishes
I love adding extra crushed candy cane right before serving for fresh, crunchy peppermint flavor. Sometimes I also dust them lightly with powdered sugar for an extra snowy holiday look. If you want to get fancy, a little edible glitter or a small peppermint candy on top adds pizzazz for parties.
Side Dishes
These cookies go perfectly with a cup of rich hot cocoa or peppermint-spiked coffee. For a holiday party, I serve them alongside a cheese platter—sweet and savory balance always wins! Even a scoop of vanilla ice cream pairs surprisingly well.
Creative Ways to Present
I like arranging the cookies on a festive platter with sprigs of pine or holly for holiday gatherings. Wrapping a few in clear cellophane tied with red ribbon makes charming homemade gifts. Once, I stacked them in a clear jar with candy cane layers for a pretty no-bake dessert centerpiece—it was a crowd-pleaser!
Make Ahead and Storage
Storing Leftovers
Store your leftover cookies in an airtight container on the counter for up to 2-3 days, but I’ve found keeping them refrigerated extends freshness to about 4-5 days. The chocolate almond bark stays firm, and the cookies keep their softness nicely.
Freezing
After they’re fully cooled, pop the cookies into a freezer-safe container or bag to freeze for up to 3 months. When I’m ready for a treat, I let them thaw on the counter until soft and melty—still tasting fresh as the day I baked them.
Reheating
If you like your cookies just-warm like me, a quick 10 seconds in the microwave revives the soft texture without melting the chocolate on top too much. Perfect for sinking your teeth into warm peppermint heaven.
FAQs
-
Can I use homemade sugar cookie dough instead of mix for the Peppermint Thumbprint Cookies with Chocolate Almond Recipe?
Absolutely! Using homemade sugar cookie dough works well, though this recipe is designed with the premade mix in mind, which results in slightly larger cookies. If using homemade dough, make sure it’s firm enough to hold a thumbprint without cracking, and bake times might vary slightly.
-
What’s the best way to crush candy canes for these cookies?
My favorite method is to put the candy canes in a sturdy plastic bag, seal it tightly, and then gently tap with a rolling pin. This gives you lovely chunky pieces instead of powder, which adds delightful texture and looks better dusted on top.
-
Can I substitute the chocolate almond bark?
Yes! If you prefer, you can use plain chocolate bark or high-quality chocolate chips melted gently. Just keep in mind that chocolate almond bark is formulated to melt smoothly and harden with a shiny finish, which looks extra polished on these cookies.
-
How do I prevent the cookie wells from disappearing during baking?
Great question! Cookie dough tends to puff up, so pressing the thumbprints right after you pull them out of the oven helps keep that indentation deep enough to hold the melted chocolate perfectly.
Final Thoughts
Making this Peppermint Thumbprint Cookies with Chocolate Almond Recipe always feels like creating a little holiday magic in my kitchen. The aroma, the festive colors, and that unbeatable combo of chocolate and mint bring so much joy. Whether you’re baking for your family, bringing a dish to a party, or just treating yourself, these cookies are guaranteed to bring smiles. Go ahead, give them a try—you’ll be hooked, just like I was!
Print
Peppermint Thumbprint Cookies with Chocolate Almond Recipe
- Prep Time: 15 minutes
- Cook Time: 10 minutes
- Total Time: 25 minutes
- Yield: 24 servings
- Category: Dessert
- Method: Baking
- Cuisine: American
Description
A festive Peppermint Thumbprint Cookies recipe featuring rich cocoa-flavored sugar cookie dough filled with melted chocolate almond bark and topped with crushed candy canes. These delightful cookies are perfect for holiday celebrations and easy to make using a premade sugar cookie mix.
Ingredients
Cookie Dough
- 1 (17.5 ounce) package sugar cookie mix
- 0.5 cup (1 stick) salted butter, softened
- 0.5 cup cocoa powder
- 2 large eggs
- 1.25 tsp peppermint extract
For Filling and Topping
- 8 ounces chocolate almond bark, chopped (about 1 cup or 4 squares)
- 0.25 cup crushed candy canes
Instructions
- Preheat Oven: Preheat your oven to 350 degrees Fahrenheit to prepare for baking the cookies.
- Mix Dough: In a large bowl, use a beater to combine the sugar cookie mix, softened salted butter, cocoa powder, eggs, and peppermint extract until the dough is completely mixed and smooth.
- Prepare Baking Sheet: Line a sheet pan with parchment paper to prevent sticking during baking.
- Form Dough Balls: Scoop 1-inch balls of dough using a 1 tablespoon measurer, then roll each ball between your hands to make a smooth surface. Place the dough balls on the parchment-lined baking sheet.
- Create Indents: Press an indent in the center of each cookie ball using your thumb or a 1 teaspoon measurer. If the dough cracks, gently mold it back together to maintain the shape.
- Bake Cookies: Bake the cookies at 350 degrees Fahrenheit for 10 minutes or until the centers begin to set and the cookies are slightly firm.
- Re-Indent Centers: Remove the cookies from the oven and carefully press the center indent again with the teaspoon measurer to ensure it’s deep enough for the filling.
- Cool Cookies: Allow the cookies to cool on the sheet pan while you prepare the melted chocolate filling.
- Melt Chocolate Bark: Place the chopped chocolate almond bark in a microwave-safe bowl. Microwave in 20 second increments, stirring between each, until the chocolate is fully melted and smooth.
- Fill Indents: Spoon the melted chocolate almond bark into the center indents of each cookie, filling the wells completely.
- Add Candy Cane Topping: Immediately sprinkle crushed candy canes over the melted chocolate before it sets to add a festive crunch and flavor.
- Set and Serve: Let the chocolate cool for 3-5 minutes until set but cookies remain slightly warm, then plate and serve.
Notes
- Storage: Store cookies in an airtight container at room temperature for 2-3 days or refrigerate for 4-5 days to keep them fresh longer.
- Freezing: Once completely cooled, freeze cookies in an airtight container for up to 3 months. Thaw at room temperature before serving.
- Crushing Candy Canes: Crush candy canes easily by placing them in a plastic bag and smashing with a rolling pin. Avoid using a food processor if you want larger chunks rather than powder.
- Cookie Size: For more cookies, make dough balls slightly smaller since the dough expands during baking but still holds the melted chocolate filling.
- Dough Note: This recipe uses a premade cookie mix, so the dough behaves differently from scratch recipes—making smaller dough balls is recommended for best results.
Nutrition
- Calories: 160 kcal
- Sugar: 12 g
- Sodium: 70 mg
- Fat: 8 g
- Saturated Fat: 5 g
- Unsaturated Fat: 2 g
- Trans Fat: 0 g
- Carbohydrates: 20 g
- Fiber: 0 g
- Protein: 2 g
- Cholesterol: 20 mg


