
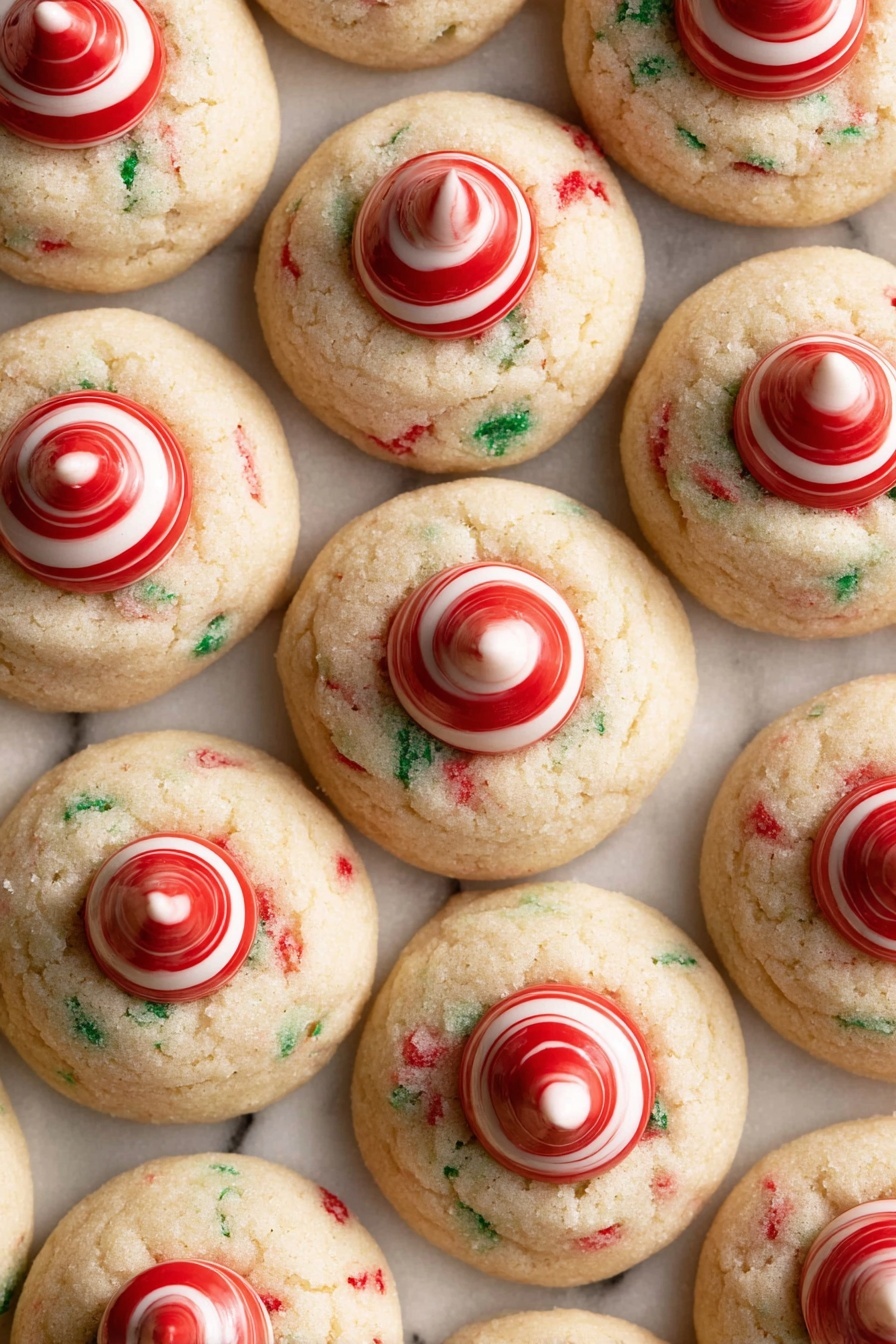
If you’re in the mood for something festive, chewy, and bursting with cool mint flavor, you’ve just got to try this Peppermint Kiss Cookies Recipe. I can’t tell you how many holiday gatherings I’ve brought these to — and honestly, they never last long. The way the crushed candy canes mix with soft sugar cookie dough, then a gooey peppermint kiss melts right on top? Pure magic. Stick with me, and I’ll share all my tips so you nail this recipe on your first try.
Why You’ll Love This Recipe
- Festive Flavors: Peppermint and candy canes combine for a seasonal treat that delights holiday guests every time.
- Perfect Texture: Soft sugar cookie base complemented by a melty peppermint kiss creates the ideal sweet-chewy bite.
- Simple Ingredients: Uses pantry staples and just a handful of unique holiday touches, making it easy to whip up quickly.
- Great for Gifting: These cookies look beautiful and hold up well, perfect for wrapping up and giving to friends or coworkers.

Ingredients & Why They Work
The key to this Peppermint Kiss Cookies Recipe is balancing mellow sugar cookie dough with fresh peppermint flavor. The candy canes add crunch and bursts of minty freshness, while that signature peppermint kiss melts into a perfect soft center.
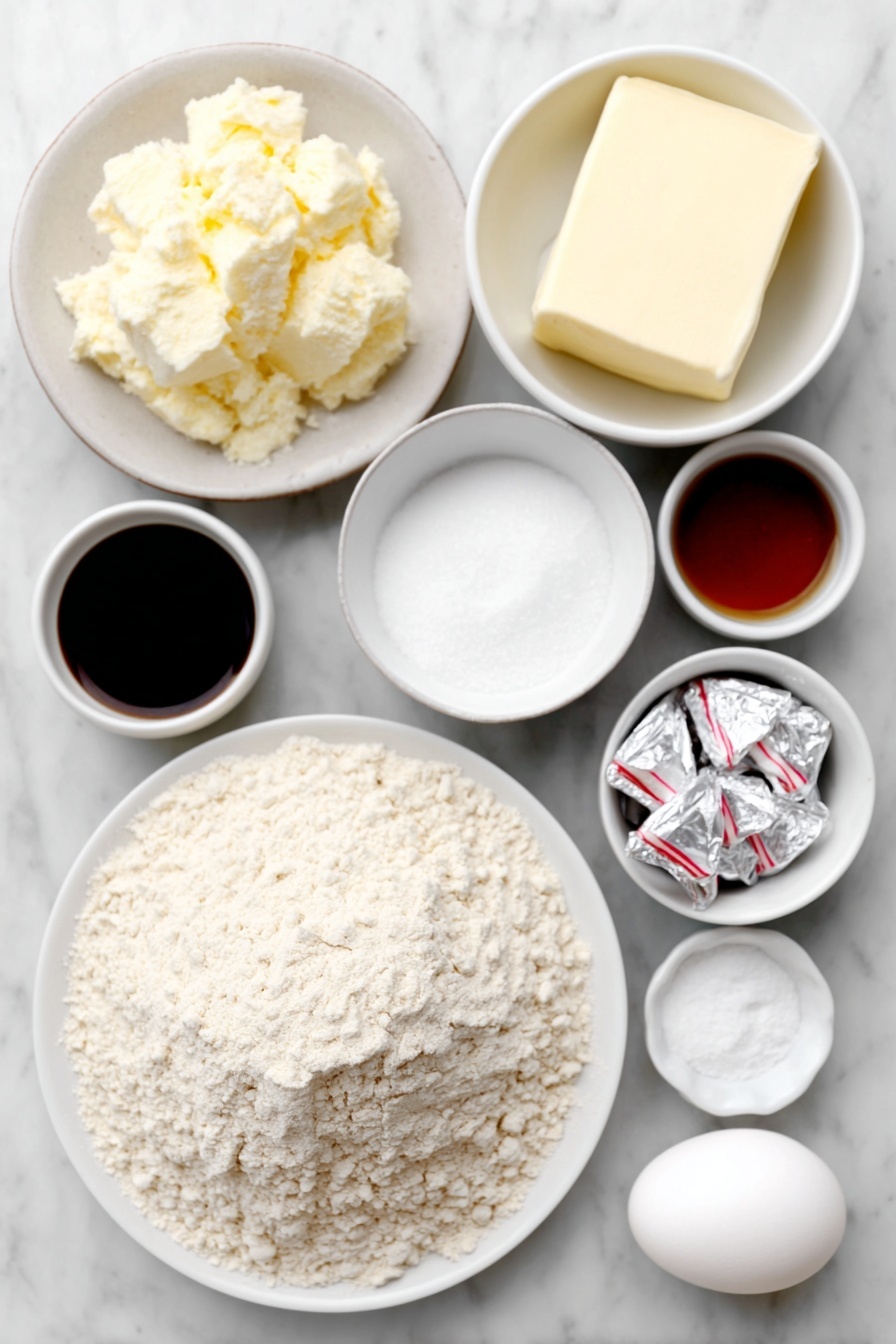
- All purpose flour: Provides the sturdy base for soft, chewy cookies without being too cakey or crunchy.
- Kosher salt: Just a little salt amps the sweetness and enhances the peppermint flavor.
- Baking powder: Adds a touch of lift so the cookies stay tender without spreading too thin.
- Unsalted butter: For richness and a buttery flavor — don’t sub margarine here as texture will suffer.
- White sugar: Promotes crisp edges while keeping the center soft and sweet.
- Egg: Binds the dough and contributes to tenderness; room temperature helps it combine smoothly.
- Vanilla extract: Rounds out the flavor — make sure to use pure vanilla for depth.
- Peppermint extract: The secret weapon for that clean, cool holiday note; a little goes a long way, so measure carefully.
- Crushed candy canes: Adds texture and bursts of authentic peppermint in every bite. Crushing them yourself fresh keeps pieces perfect size.
- Hershey’s Peppermint Kisses: Melts into the tops of cookies for that iconic candy center and festive look.
Make It Your Way
One of the things I enjoy most about this Peppermint Kiss Cookies Recipe is how easy it is to customize based on your taste or occasion. Whether you want more mint punch or prefer a touch of chocolate, these cookies are a great blank canvas.
- Chocolate Variation: I sometimes swap out half the peppermint kisses for classic milk chocolate Hershey’s kisses, giving a fun mint-chocolate combo that’s always a crowd pleaser.
- Gluten-Free: You can try a 1-to-1 gluten-free flour blend in place of all-purpose flour, but keep an eye on texture since it may be slightly crumblier.
- Extra Crunch: For added texture, sprinkle some crushed peppermint candies on top right after pressing the kisses in, before chilling or freezing.
- Intensity Boost: If you’re a peppermint fan like me, adding an extra 1/8 teaspoon peppermint extract amps up the flavor without overpowering the cookie.
Step-by-Step: How I Make Peppermint Kiss Cookies Recipe
Step 1: Gather & Prep Your Ingredients
First things first, get everything ready. Measure your flour, sugar, and other ingredients carefully — baking is a science, and precision makes all the difference here. Line your baking sheets with parchment paper because this keeps your cookies clean and prevents sticking.
Step 2: Mix the Dry Ingredients
Whisk together your all purpose flour, kosher salt, and baking powder in a large bowl. This even distribution makes sure every cookie has the perfect balance of rise and flavor. Set this aside while you move on to the wet ingredients.
Step 3: Cream Butter and Sugar
Using an electric hand mixer, beat the softened unsalted butter and white sugar together until the mixture is light and fluffy — usually about 3 minutes. This is the key to getting cookies with a good rise and tender crumb, so don’t rush it!
Step 4: Add Egg and Flavors
Next, add the egg, vanilla extract, and peppermint extract to your fluffy butter and sugar mix. Beat again until fully combined and fluffy. The peppermint extract gives just a subtle minty flavor; if you like it stronger, you can increase slightly, but be careful not to overpower the cookies.
Step 5: Combine Wet and Dry Ingredients & Add Candy Canes
Mix the dry ingredients into the wet ingredients using your hand mixer on low to medium speed until the dough just comes together — don’t overmix or the cookies may turn out tough. Then fold in the crushed candy canes for that signature festive crunch. I find quickly beating them in keeps the pieces evenly distributed.
Step 6: Chill the Dough
This step makes a big difference! Roll your cookie dough into balls just under one tablespoon each, then place them on the parchment-lined baking sheet and pop the whole tray into the fridge for at least an hour. Chilling helps the cookies keep their shape in the oven and improves texture. Trust me, it’s worth the wait.
Step 7: Bake in Batches
Preheat your oven to 375°F (190°C). Divide the chilled dough evenly onto 1-3 parchment-lined baking sheets (about 12 balls per sheet) — baking in batches is key for even cooking because overcrowding makes cookies spread too much. Bake for 11 minutes, and you’ll see the edges just start to turn golden.
Step 8: Add the Peppermint Kisses
Once your cookies come out of the oven, let them cool on the baking sheet for about 5 minutes. Then, gently press an unwrapped Hershey’s Peppermint Kiss right into the center of each cookie. The heat softens the candy, making it sink into the dough and creating that dreamy, melty center we all love.
Step 9: Chill for a Perfect Shape
If you want your peppermint kisses to keep that classic kiss shape instead of fully melting, pop the cookie tray into the freezer for about 10 minutes after pressing in the candies. This is a trick I picked up that really ups the presentation — perfect if you’re making these for gifts or special occasions.
Pro Tips for Making Peppermint Kiss Cookies Recipe
- Room Temperature Ingredients: Let your butter and egg come to room temperature before mixing to ensure smoother, fluffier dough.
- Don’t Skip Chilling: I learned this the hard way—chilling the dough prevents cookies from spreading too thin and helps get that soft, chewy texture.
- Baking in Batches: Give your cookies room by baking on separate trays or batches; this keeps edges crisp and centers perfect.
- Use Fresh Candy Canes: Crushing candy canes fresh before mixing provides better texture than pre-crushed ones that can become soft or sticky.
How to Serve Peppermint Kiss Cookies Recipe
Garnishes
I usually keep it simple—after all, these cookies are festive enough on their own. But for a little extra sparkle, I sometimes sprinkle a pinch of crushed candy canes on top right after pressing in the kisses, adding a pop of red and a bit more crunch.
Side Dishes
These cookies pair wonderfully with a warm cup of hot cocoa or a mug of peppermint tea to double down on that minty goodness. They’re also lovely alongside a cheese platter featuring mild cheeses like cream cheese or brie—an unexpected but delightful combo!
Creative Ways to Present
For holiday parties, I arrange these on a festive platter lined with Christmas-themed napkins and add sprigs of fresh pine or holly to complement the peppermint vibe. You can also stack them with layers of wax paper inside clear cello bags tied with red ribbon for sweet seasonal gifts that look straight out of a bakery.
Make Ahead and Storage
Storing Leftovers
I store leftover Peppermint Kiss Cookies in an airtight container at room temperature, layered with wax paper to avoid sticking. They stay soft and delicious for up to a week—perfect if you want to savor them slowly or bring some to work the next day.
Freezing
Freezing works great! Once the cookies have cooled completely, I place them in freezer-safe containers separated by layers of parchment. They keep well for up to three months. For a fresh-baked feeling, I also freeze the cookie dough balls ahead of time — just thaw them overnight in the fridge before baking as usual.
Reheating
To refresh frozen or leftover cookies, I pop them in the oven at 300°F for about 5 minutes — this revives that just-baked softness without melting the peppermint kiss too much. Microwave reheating tends to make the cookie chewy, so oven reheating is my go-to.
FAQs
-
Can I use regular Hershey’s Kisses instead of peppermint ones?
Absolutely! While peppermint kisses deliver that classic minty pop, swapping in regular milk chocolate kisses creates a delicious chocolate version that’s just as tasty. You can even mix and match for variety.
-
Why do I need to chill the dough before baking?
Chilling firms up the butter in the dough, which helps the cookies hold their shape during baking and prevents excessive spreading. It also improves texture, making the cookies tender but not greasy.
-
Can I make this recipe dairy-free?
Yes—you can substitute dairy-free butter and choose dairy-free chocolate kisses. Just be mindful that the texture may vary slightly, so I recommend testing a small batch first to adjust baking time if needed.
-
How do I prevent the peppermint kisses from melting too much?
Press the kisses into the cookies after baking and cooling them for about 5 minutes, then chill or freeze for 10 minutes to set the shape. This cooling trick keeps the kisses from fully melting and spreading.
Final Thoughts
This Peppermint Kiss Cookies Recipe has been my go-to for holiday cookie swaps and cozy evenings with family. There’s something so comforting about biting into a sugar cookie that melts into peppermint bliss — it’s like wrapping up a winter hug. I can’t wait for you to try it out and make some warm memories in your kitchen. Trust me, once you make these, they’ll become a holiday tradition you look forward to every year!
Print
Peppermint Kiss Cookies Recipe
- Prep Time: 1 hour 15 minutes
- Cook Time: 11 minutes
- Total Time: 1 hour 26 minutes
- Yield: 32 cookies
- Category: Dessert
- Method: Baking
- Cuisine: American
- Diet: Vegetarian
Description
These Peppermint Kiss Cookies are festive, soft, and buttery treats perfect for the holiday season. They combine the classic flavors of vanilla and peppermint with a delightful crunch of crushed candy canes and are topped with Hershey’s Peppermint Kisses for a sweet finishing touch. Easy to prepare and perfect for sharing at holiday gatherings or as homemade gifts.
Ingredients
Dry Ingredients
- 2 ¼ cups (270 grams) all purpose flour
- ½ teaspoon kosher salt
- ¼ teaspoon baking powder
Wet Ingredients
- ⅔ cup (150 grams) unsalted butter, softened
- ¾ cup (150 grams) white sugar
- 1 large egg, at room temperature
- 1 ½ teaspoon vanilla extract
- ¼ teaspoon peppermint extract
Add-ins
- ¼ cup candy canes, crushed (about 3 candy canes)
- 32 Hershey’s Peppermint Kisses, unwrapped
Instructions
- Prepare Baking Sheets: Line a large baking sheet with parchment paper to prevent sticking and make cleanup easy.
- Mix Dry Ingredients: In a large bowl, whisk together the flour, kosher salt, and baking powder until well combined. Set aside.
- Cream Butter and Sugar: In a separate large mixing bowl, beat the softened butter and white sugar with an electric hand mixer for about 3 minutes until the mixture is fluffy and pale.
- Add Wet Ingredients: Add the room temperature egg, vanilla extract, and peppermint extract to the butter-sugar mixture. Beat again until everything is well combined and fluffy.
- Combine Wet and Dry: Slowly add the dry ingredients into the wet ingredients while mixing with the hand mixer until fully incorporated.
- Add Crushed Candy Canes: Gently fold in the crushed candy canes, then mix quickly to distribute evenly throughout the dough.
- Form Dough Balls: Scoop small balls of cookie dough, just less than 1 tablespoon each, and roll between your hands to form smooth balls. Place them on the prepared baking sheet, then refrigerate for 1 hour to let the dough rest.
- Preheat Oven and Prepare Sheets: Preheat the oven to 375°F. Line 1 to 3 baking sheets with parchment paper to accommodate batches of cookies.
- Bake Cookies: Arrange about 12 dough balls per baking sheet spaced evenly. Bake in the oven for 11 minutes to ensure even cooking, baking in batches as needed.
- Add Peppermint Kisses: Remove cookies from the oven and let them cool for 5 minutes. Immediately press one unwrapped Hershey’s Peppermint Kiss into the center of each cookie.
- Cool Completely: Allow the cookies to cool completely on a wire rack before enjoying. For a perfect Kiss shape, place the cookies in the freezer for 10 minutes right after pressing the Kisses.
Notes
- Storage: Store leftover cookies in an airtight container at room temperature for up to 1 week. Separate layers with wax paper to prevent sticking.
- Freezing Cookies: After cooling completely, freeze cookies in a freezer-safe container or bag for up to 3 months. Thaw before eating.
- Freezing Dough: Cookie dough can be frozen in a freezer-safe container. Thaw in the refrigerator before baking as directed. Store Hershey’s Peppermint Kisses separately until ready to use.
- Shape Kisses Perfectly: For a clean, neat appearance of the Peppermint Kisses, immediately freeze the cookies after pressing the candy into them to prevent melting and distortion.


