
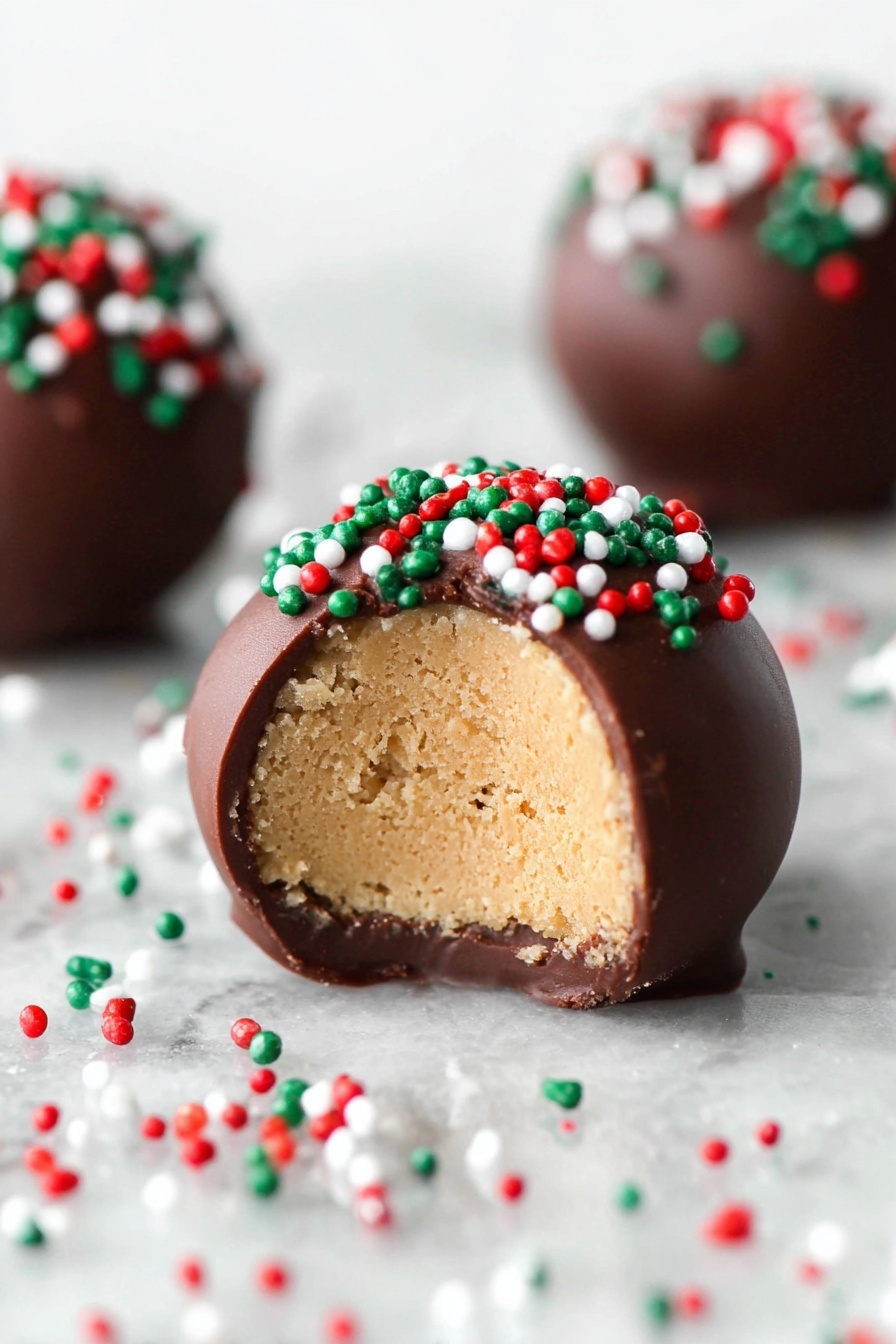
If you’re looking for a quick, no-bake treat that absolutely melts in your mouth and combines two classic flavors, you’ll adore this Chocolate Peanut Butter Balls Recipe. I first made these for a last-minute holiday party, and they disappeared faster than I could say “pass me another one!” Stick with me because this recipe is straightforward, customizable, and perfect for satisfying your sweet tooth cravings without much fuss.
Why You’ll Love This Recipe
- Simplicity: Just a handful of ingredients and about 20 minutes of prep time, perfect if you’re short on time.
- Rich Flavor Combo: The classic peanut butter and chocolate pairing is always a crowd-pleaser, creamy and crunchy.
- Customizable: Easily switch between creamy or chunky peanut butter, and add sprinkles or drizzle white chocolate for flair.
- Great for Any Occasion: These bite-sized wonders are perfect for parties, gifts, or just a sweet indulgence at home.
Ingredients & Why They Work
This Chocolate Peanut Butter Balls Recipe uses simple pantry staples that blend perfectly. The texture and richness come from the peanut butter and butter combo, while powdered sugar adds just the right sweetness and structure. Chocolate chips melt into a silky coating that hardens beautifully for that satisfying snap.
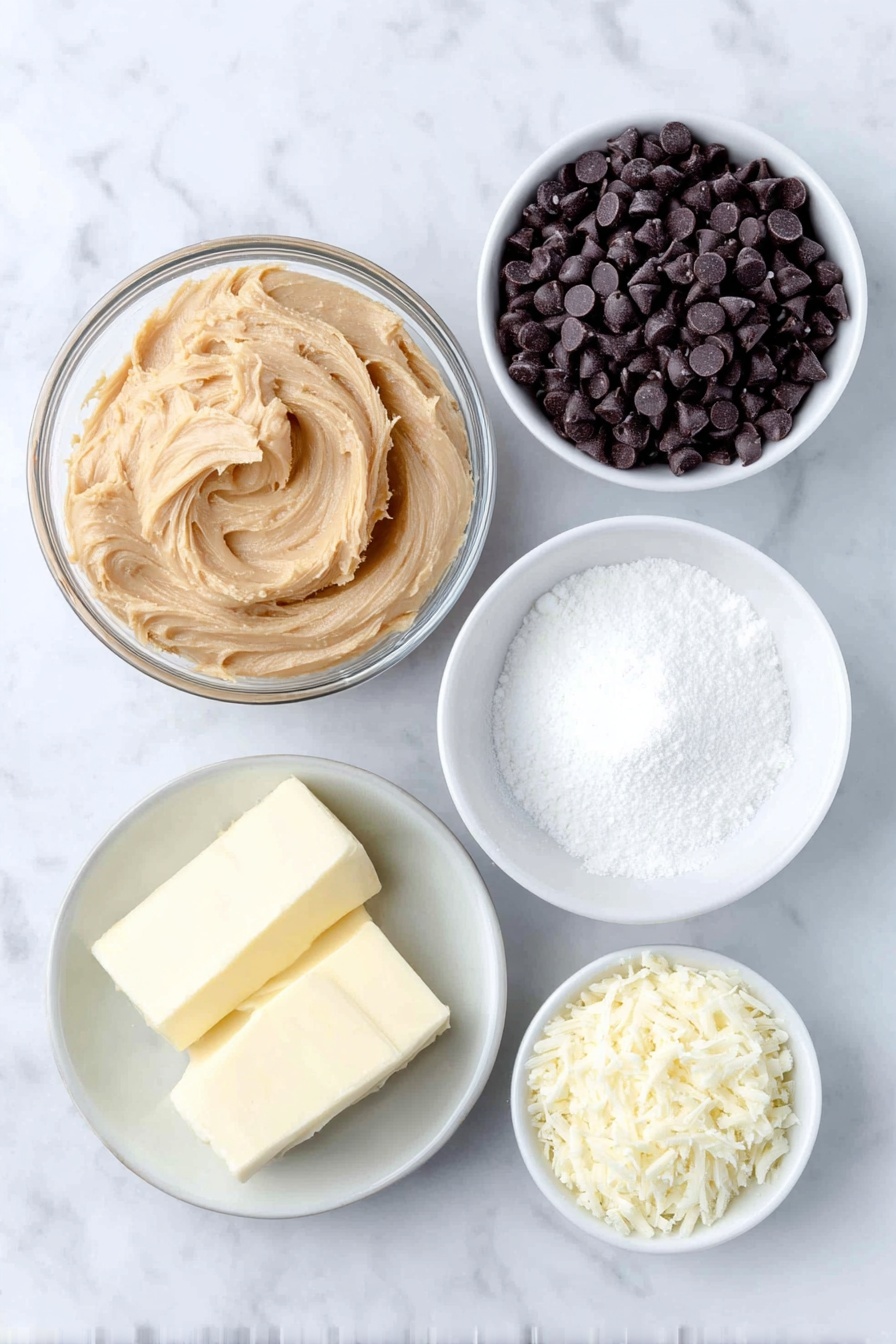
- Peanut Butter: I like using chunky for extra texture, but creamy works beautifully if you prefer smooth bites.
- Butter: Softened butter gives the filling a creamy, melt-in-your-mouth consistency.
- Powdered Sugar: This thickens the mixture and balances the natural saltiness of peanut butter.
- Vanilla Extract: Just a teaspoon brings a lovely depth and warmth to the filling.
- Chocolate Chips: Semi-sweet or milk chocolate works great; choose quality chips for better flavor and smooth coating.
- Paraffin Wax: Helps the chocolate coating harden with a nice sheen and snap but optional if you use candy melts instead.
- Sprinkles (optional): Adds festive colors and a fun crunch if you’re making these for holidays or special occasions.
Make It Your Way
One of the best parts about this Chocolate Peanut Butter Balls Recipe is how easy it is to tweak. I often swap between different peanut butters or experiment with flavors in the coating. Don’t be afraid to make it uniquely yours!
- Nut allergies? Use sunflower seed butter instead of peanut butter — I’ve done this for a friend and it’s just as delicious.
- Make it extra festive: Add holiday-themed sprinkles or drizzle white or dark chocolate on top for a beautiful finish.
- Go vegan: Use vegan butter and dairy-free chocolate chips, and enjoy the same rich taste.
- Add crunch: Toss in chopped peanuts or crispy rice cereal to the mixture for an added texture surprise.
Step-by-Step: How I Make Chocolate Peanut Butter Balls Recipe
Step 1: Mix Peanut Butter Filling Until Silky
Start by combining 1½ cups of your favorite peanut butter (creamy or chunky), ½ cup softened butter, 2 cups powdered sugar, and 1 teaspoon vanilla extract in a large bowl. I usually use my hands here because it helps meld everything together evenly and I can feel when the texture is just right — smooth but firm enough to hold shape. Don’t skip softening the butter; it really makes the filling creamy and easy to roll later.
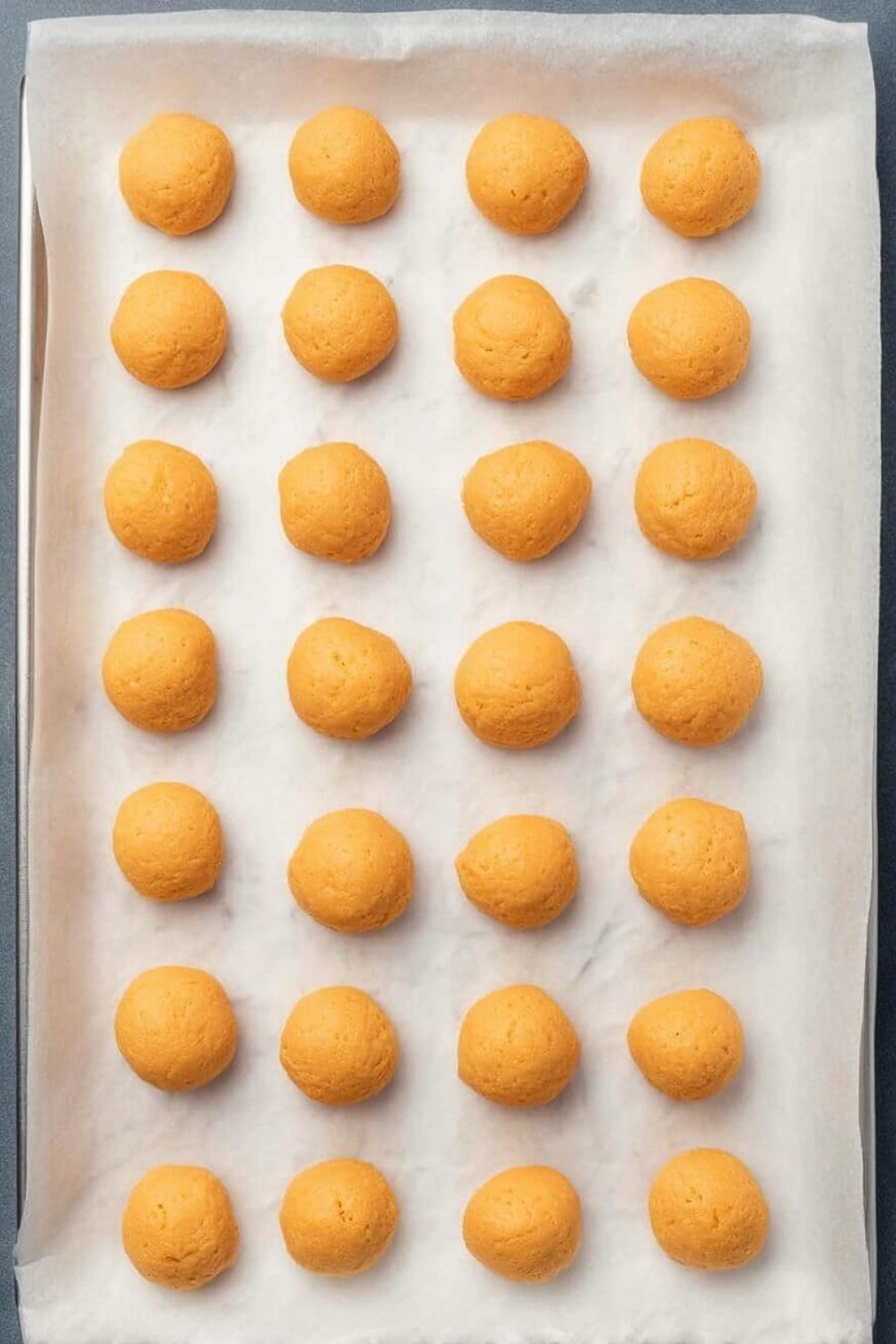
Step 2: Shape Those Perfect Balls
Once your mixture is ready, roll it into about 25 bite-sized balls. I like to line them up on a baking sheet while I work so none stick to your fingers. If the mixture feels sticky, chill it in the fridge for 10 minutes before rolling — that helps a lot.
Step 3: Dip Balls in Smooth Chocolate Coating
Set up a double boiler by boiling water in a pot, then place heatproof bowl with 12 oz chocolate chips and 2 tablespoons grated paraffin wax on top. Stir continuously until smooth and glossy. (If you prefer candy melts, just melt those according to package directions and skip the wax.) Using a spoon, dip each peanut butter ball, ensuring it’s completely covered. Transfer them to a rimmed sheet pan lined with wax or parchment paper.
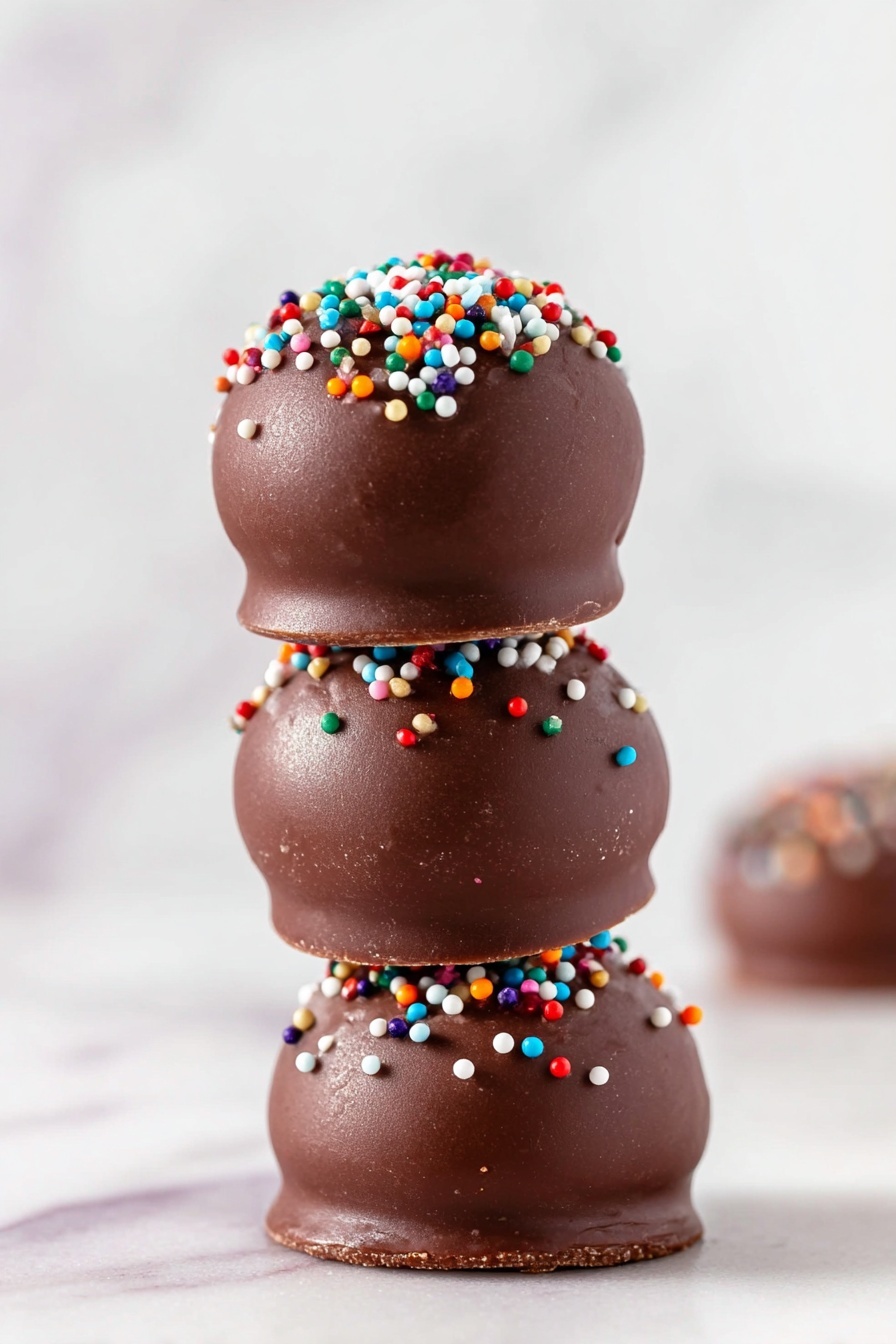
Step 4: Get Creative With Your Finish
While the chocolate is still wet, sprinkle on festive sprinkles or drizzle with melted white chocolate — I love adding some snowy white drizzle for a gorgeous contrast. Pop your tray into the freezer for about 30 minutes or until the coating is set and hard.
Pro Tips for Making Chocolate Peanut Butter Balls Recipe
- Use Room Temperature Butter: Soft butter blends more easily with peanut butter, preventing lumps and ensuring a smooth filling.
- Avoid Overheating Chocolate: When melting, stir constantly and keep heat low to avoid seizing or burning.
- Prep Your Workstation: Have the dipping setup near the fridge or freezer so you can quickly chill balls after dipping without messing the chocolate coat.
- Keep Balls Cold Before Dipping: Chilling balls just a bit before dipping helps create a smoother coating and less cracking.
How to Serve Chocolate Peanut Butter Balls Recipe
Garnishes
I usually keep it classic with rainbow or chocolate sprinkles because they add cute pops of color and a little crunch. At Christmas, red and green sprinkles make these look extra festive. Occasionally, I drizzle on some white chocolate for flair — it’s like an easy edible decoration that elevates the whole look.
Side Dishes
These Chocolate Peanut Butter Balls are a perfect sweet bite on their own, but if you’re serving them at a party, I like pairing with fresh fruit—like berries—to balance the richness. Also, a cup of dark roast coffee or a glass of cold milk is a fantastic side to complement the flavors.
Creative Ways to Present
For special occasions, I love arranging these balls in pretty gift boxes lined with tissue paper as edible gifts. You can also skewer smaller balls on decorative sticks for a “pick me up” dessert display or arrange them on tiered trays with other bite-sized treats to wow your guests.
Make Ahead and Storage
Storing Leftovers
Leftover peanut butter balls keep well in an airtight container in the refrigerator for up to two weeks. I usually layer them between parchment paper to prevent sticking, and they stay just as tasty as the day I made them.
Freezing
Freezing is a game-changer! I pop these into a freezer-safe container separated with parchment sheets and freeze for up to three months. When I want a quick snack, I just move a few to the fridge the night before to thaw gently. They keep their texture and flavor beautifully.
Reheating
I don’t recommend microwaving these as it softens the chocolate coating too much. Instead, bring them to room temperature by resting on the counter for 15-20 minutes — the taste stays rich, and the texture is perfect for biting into.
FAQs
-
Can I use natural peanut butter for this recipe?
Natural peanut butter works, but because it can be oilier and less thick, you might find the mixture a bit softer to roll. If using natural, chill the mixture longer before shaping balls and be gentle during dipping.
-
What’s the purpose of paraffin wax in the chocolate coating?
Paraffin wax helps the chocolate harden with a glossy finish and provides that satisfying snappy texture. It’s traditional in candy-making but can be omitted if using candy melts instead, which already have a good set.
-
How can I make this recipe gluten-free?
This recipe is naturally gluten-free, just be sure to use gluten-free chocolate chips and check that your peanut butter doesn’t have added gluten-containing ingredients.
-
Can I make smaller or bigger balls?
Absolutely! Adjust the size according to your preference. Just remember that baking/dipping times won’t change, but smaller balls will be easier to eat in one bite.
-
How long do these chocolate peanut butter balls last?
Stored properly in the fridge, they last up to two weeks, and frozen up to three months. Just keep them airtight so they don’t dry out or absorb fridge odors.
Final Thoughts
Honestly, this Chocolate Peanut Butter Balls Recipe is one of those quick, sweet fixes that’ll become your go-to whenever you want something homemade with minimal effort. I love how versatile and forgiving it is—you can easily make it your own with different flavors or toppings. Plus, these little bites always bring a smile around the table. Give it a try, and I promise you’ll keep coming back for more!
Print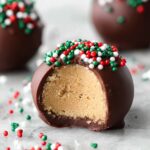
Chocolate Peanut Butter Balls Recipe
- Prep Time: 20 minutes
- Cook Time: 15 minutes
- Total Time: 35 minutes
- Yield: 25 servings
- Category: Dessert
- Method: Stovetop
- Cuisine: American
Description
These Chocolate Peanut Butter Balls are a delightful no-bake treat combining creamy peanut butter with sweet powdered sugar, all coated in smooth chocolate. Perfect for holiday celebrations or anytime you crave a rich, bite-sized dessert.
Ingredients
Peanut Butter Mixture
- 1½ cups chunky or creamy peanut butter
- ½ cup butter softened
- 2 cups powdered sugar
- 1 teaspoon vanilla extract
Chocolate Coating
- 12 oz bag of chocolate chips
- 2 tablespoons paraffin wax grated (optional, omit if using candy melts)
Optional Toppings
- Sprinkles
- White chocolate for drizzle (optional)
Instructions
- Prepare the peanut butter mixture: In a large bowl, combine peanut butter, softened butter, powdered sugar, and vanilla extract. Mix thoroughly until smooth and well combined.
- Form peanut butter balls: Shape the mixture into 25 equal-sized balls. Place them on a tray or plate while preparing the chocolate coating.
- Heat chocolate and wax: Set up a double boiler by bringing water to a rolling boil in a pot, then place a heatproof bowl over it (without touching the water). Add chocolate chips and grated paraffin wax to the bowl and stir constantly until the mixture is smooth and fully melted. (If using candy melts, omit wax and follow package instructions.)
- Dip the peanut butter balls: Using a spoon, dip each peanut butter ball into the melted chocolate, ensuring it is fully coated. Place the dipped balls onto a rimmed sheet pan lined with wax or parchment paper.
- Add toppings: While the chocolate is still wet, sprinkle with holiday-themed sprinkles or drizzle with melted white chocolate if desired.
- Set and chill: Place the tray in the freezer for about 30 minutes to allow the chocolate coating to harden completely.
Notes
- Storage: Store peanut butter balls in an airtight container in the refrigerator for up to 2 weeks.
- Freezing: Freeze in a freezer-safe container for up to 3 months.
- Substitution: If you prefer not to use paraffin wax, candy melts can be used as a coating alternative. Simply follow the candy melts package instructions and omit wax.
- Use a fork or dipping tool for easier chocolate coating and less mess.
- Let balls cool slightly if peanut butter mixture is too warm before dipping to prevent melting chocolate.
Nutrition
- Calories: 250 kcal
- Sugar: 20 g
- Sodium: 50 mg
- Fat: 15 g
- Saturated Fat: 8 g
- Unsaturated Fat: 6 g
- Trans Fat: 0.5 g
- Carbohydrates: 25 g
- Fiber: 1 g
- Protein: 5 g
- Cholesterol: 20 mg


